
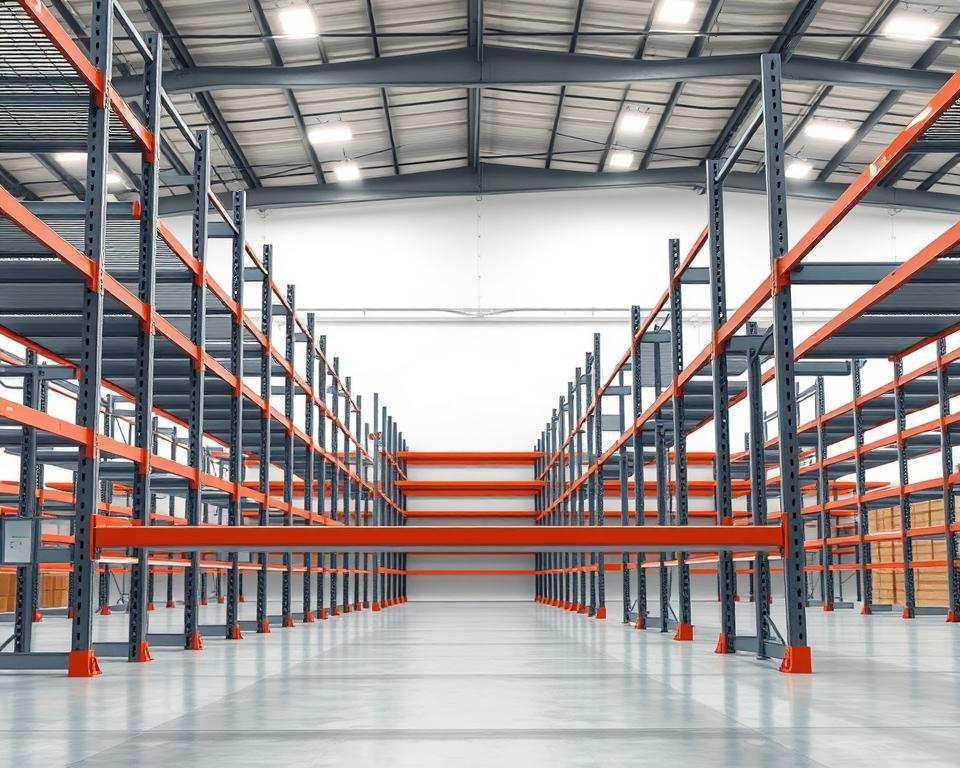
Effective Inventory Control with Warehouse Racking
In a compact logistics hub near Changi, a small team at a third-party warehouse made a significant change. Overnight, they moved from floor/block stacking to a structured racking layout. This move allowed them to reclaim aisles, improve forklift safety, and reduce daily search time for pallets.
In only a few weeks, inventory counts sped up and expensive floor expansion was avoided. Such a solution suits organisations aiming to maximise space with racking.
Racking systems are designed to transform cubic warehouse volume into organised storage. They enable smooth material movement and precise inventory counts for https://www.ntlstorage.com/racking-system-components-and-their-functions/. For Singapore operators, where land is expensive, these systems are essential for efficient inventory storage solutions.
The primary goals of racking systems include optimising storage space, simplifying goods movement, and boosting supply chain efficiency. Benefits span improved forklift/pallet-jack access, less clutter and load-fall risk, flexibility for mixed SKUs, and scalable capacity as stock profiles change.
Effective rollout blends assessment, design, sourcing, and proper installation. It further depends on robust labelling and thorough staff training. This ensures managing inventory with racking systems yields concrete gains in warehouse inventory management. It can defer costly increases in floor area.
What is a warehouse racking system and why it matters for Singapore warehouses
Knowing racking fundamentals helps teams optimise space usage and material flow. It’s a framework of racks and shelving in warehouses, distribution centers, and industrial facilities. It organizes and stores goods efficiently by using vertical space. Well-designed systems boost pick speed, inventory visibility, and safety.
Definition and core components
Typical assemblies use uprights, load beams, wire decking, and pallet supports, among others. Together they create bays and beam levels that define storage locations. It’s essential to match components with load types and adjust as inventory needs evolve.
Role in modern warehousing and supply chains
Racking systems are vital for efficient inventory management by assigning specific locations for SKUs. This makes inventory counts quicker and picking more accurate. Many operations integrate racking with barcode or RFID tracking and warehouse management systems for real-time visibility. This combination boosts throughput and supports various picking methods, impacting order fulfillment speed.
Why Racking Suits Singapore’s Space Constraints
With tight Singapore floor space, vertical capacity is paramount. High-density solutions like drive-in and pallet flow reduce aisle needs and increase storage density. The right mix balances density with selectivity, ensuring efficient use of space without compromising safety.
Types of Racking Solutions & How to Select the Right Configuration
Selecting the correct racking is crucial for efficient warehouse operations. This section explains how rack form affects day-to-day work. We compare common rack types, map them to inventory profiles, and overview cost factors for Singapore warehouses.
Overview of common rack types
Selective pallet racking is the most common choice. It allows direct access to each pallet position from an aisle. That suits high-turnover SKUs and flexible layouts. Expect roughly $75–$300 per pallet slot.
Drive-in/drive-thru racks deliver high density by allowing forklifts to enter lanes. They are suitable for bulk or low-SKU-variability storage and reduce aisle space. Costs range from $200 to $500 per pallet position.
With projecting arms, cantilever suits long or awkward loads like lumber and tube. Front-column-free design eases loading. Costs commonly run $150–$450 per arm.
In pushback, pallets sit multiple-deep on nested carts or rails. Density goes up NTL Storage while the newest pallet remains easy to access. Costs are about $200 to $600 per pallet position.
Pallet flow or gravity racking uses rollers for FIFO operations. It suits perishable goods and expiry-managed stock. Costs typically range $150–$400 per position.
Automation (AS/RS/robotics) spans broad cost ranges. They deliver top density, fast throughput, and deep WMS integration. AS/RS pricing depends on throughput, automation scope, and site complexity.
Match Rack Type to Your Inventory Profile
Evaluate SKU dimensions, weight, turnover, and handling equipment when choosing a rack. Fast movers and mixed ranges suit selective racks or AS/RS with pick faces. That enables efficient storage and rapid picks.
Cantilever suits long, bulky, or irregular goods. This keeps aisles clear and reduces product handling time. Matching rack type to inventory avoids damage and speeds loading.
Where FIFO is critical (food, pharma), pallet-flow maintains expiry sequence automatically. This makes them a core element of warehouse inventory management for regulated products.
Bulk loads with few SKUs fit drive-in/drive-thru or pushback. Such systems maximise space and support dense inventory management with racking.
Cost Considerations by Rack Type
Budgeting requires more than per-unit prices. Base rack cost is only the start. Include installation labour, anchors, decking, supports, and safety add-ons. Also include engineering, inspections, and staff training.
Reference ranges: selective $75–$300, drive-in $200–$500, cantilever $150–$450/arm, pushback $200–$600, pallet flow $150–$400, AS/RS variable. Assess cost considerations per https://www.ntlstorage.com/managing-inventory-with-racking-systems-complete-guide alongside lifecycle costs.
Include slab reinforcement, freight, and downtime exposure. Long-run racking benefits include better space use, quicker picks, and less handling damage. These gains often justify higher upfront investment.
| Rack Type | Best Use | Typical Unit Cost | Key Benefit |
|---|---|---|---|
| Selective Pallet Racking | High-turnover, varied SKUs | $75–$300 per pallet position | Direct pallet access enables fast picks |
| Drive-in / Drive-thru | Bulk, low-variability SKUs | $200–$500 / position | Density gains by cutting aisles |
| Cantilever Racking | Long or irregular loads | $150–$450 per arm | Front-column-free for easy long-load handling |
| Pushback | Dense storage with good access | $200–$600 / position | Multi-deep storage with simple retrieval |
| Pallet-Flow (Gravity) | FIFO for perishables/expiry | $150–$400 per pallet position | Automatic FIFO aids expiry control |
| AS/RS + Robotics | Automated, high-throughput ops | Varies widely by automation level | Top density, speed, and WMS integration |
managing inventory with racking systems
Fixed, logical rack locations simplify inventory tracking. Assign each SKU a specific slot based on its master data. It minimises misplacement and accelerates retrieval for better inventory management.
Organize SKUs by turnover, size, and compatibility. Use A/B/C zoning to position fast movers. Place them at optimal pick-face heights to cut travel and raise pick rates.
Choose rotation methods aligned to product life cycles. For perishables, enforce FIFO via pallet flow or strict putaway. For dense, LIFO-friendly operations, consider pushback or drive-in racking.
Embed rack locations into daily control routines. Do rack-level cycle counts and physical slot audits to resolve discrepancies. Sync results to the WMS to maintain accuracy.
Optimize pick paths and staging areas to decrease travel time and handling errors. Set rack heights to forklift reach and ergonomic limits for safety. Educate staff on load limits, correct pallet placement, beam clipping, and spacing.
Monitor operational KPIs that reflect racking performance: order pick rate, putaway time, space utilisation, inventory accuracy, and rack damage incidents. Review weekly trends to pinpoint improvements.
Set clear SOPs, refresh training, and add visual controls to keep floor rules followed. With shared understanding, racking control stays routine, reliable, and trackable.
Design, load calculations, and installation best practices
Creating a solid racking design in Singapore begins with a thorough site review. It’s essential to gather data on inventory profiles, handling equipment specifications, ceiling heights, column locations, and floor load limits. This phase is crucial to space optimisation with racking. It ensures safety and operational efficiency.
Assessment and layout planning
Kick off with ABC analysis of SKU velocity. Site fast movers near despatch in easy-access zones. Use deeper lanes for slower, bulky items. Balance aisle widths for safe forklift use versus density.
Plan for circulation paths that include fire exits, sprinkler coverage, and inspection access. Engage engineers and trusted vendors early. That keeps solutions compatible with the facility and compliant.
Load Capacity & Shelving Load Calculation
Calculate shelf loads based on material, shelf dimensions, and support spacing. Use manufacturer load tables plus safety factors. Confirm deflection thresholds and per-pallet load limits.
Check slab capacity for heavy or point loads. Engage engineers if reinforcement is required. Label load ratings per bay and educate staff on limits. Regular checks prevent overstressing uprights and beams.
Proper shelving load calculation keeps operations compliant and reduces the risk of collapse.
Procurement & Installation Checklist
Apply a procurement checklist to confirm rack type, bay size, finish, and accessories. Include compliance certs and warranty terms in documentation.
| Phase | Core Items | Stakeholders |
|---|---|---|
| Planning | Inventory profile, aisle widths, fire access, SKU zoning | Warehouse lead; logistics planner; structural engineer |
| Engineering | Load tables, beam deflection checks, floor capacity review | Manufacturer engineer, structural engineer |
| Procure | Type; bay height; finish; accessories; compliance docs | Purchasing; vendor rep; safety officer |
| Installation | Prep site; anchor uprights; secure beams; add decking/wall ties | Certified installers; site supervisor |
| Verification | Plumb uprights; verify clips/clearances; signage | Inspector; safety officer; engineer |
| Post-Install | Initial inspection; authority registration; as-builts | Engineer; compliance; maintenance |
Follow installation best practices: clean and level floors, mark bay positions, anchor uprights, and install beams per vendor specs. Fit decking and pallet supports, apply cross-ties and wall ties where required. Verify clips and plumb uprights; post visible load ratings.
After install, train teams on managing inventory with racking systems, safe loads, and damage reporting. Retain as-builts/inspection logs to support maintenance and upgrades.
Inventory Control with Racking: Organisation, Labelling & Tech Integration
Tidy racking plus consistent labels reduce mistakes and smooth daily work. Start with a logical scheme that assigns unique IDs to each area. Ensure the scheme is picker-friendly and aligned to the WMS.
Utilise durable labels, barcodes, and RFID tags at eye level on each bay and beam. Include SKU, load limit, and handling instructions on labels. Standardising label content across the facility enhances inventory control and reduces training time for new employees.
Barcode and RFID scanning expedite cycle counts and real-time inventory updates. Scan on putaway/pick to maintain accurate stock. It integrates control with WMS, lowering audit variances.
Your pick strategy influences rack arrangement. With zone picking, teams own certain zones. Batching groups SKUs for multiple orders. Wave picking sequences orders by dispatch time. Pick/put-to-light can increase speed for fast movers.
Optimise paths to reduce travel; place high-velocity SKUs near packing. Create dedicated pick faces and staging lanes for top SKUs. Use FIFO (pallet flow) on perishables to ensure rotation and limit waste.
Track pick accuracy, picks/hour, and travel time. Use data to rebalance locations and rack allocations. Small, frequent adjustments drive workflow optimisation.
WMS integration maps every bay, level, and slot in software. Set up location hierarchies, pick modes, replenishment rules, and paths. Match WMS instructions to actual layout for smooth operations.
Automation paired with racking can significantly raise throughput in high volume. Evaluate AS/RS, shuttles, and AMRs for dense, rapid operations. Tie automation into barcode/RFID and WMS for live, accurate control.
Safety, Maintenance & Regulatory Compliance for Racking
Racking safety begins with clear load limits and physical safeguards. Label every bay with its capacity. Use clips/backstops/supports to restrict movement. Maintain clear aisles and marked egress routes.
Regular maintenance minimises risk and downtime. Inspect weekly for damage, misalignment, or anchor failure. Schedule qualified inspections and maintain a written log. This helps audits and insurer reviews.
If damage appears, remove affected bays from service until repaired. Tighten anchors, replace missing safety clips, and re-label worn signage promptly. A formal reporting process for rack impacts speeds repairs and prevents repeat incidents, preserving inventory management benefits.
Regulatory compliance in Singapore demands adherence to local workplace safety rules and building codes. Use international standards like OSHA where applicable. Train teams on safe stacking, capacity limits, and incident reporting. This fosters a safety culture that extends rack life and supports long-term maintenance and compliance.
FAQ
What is a warehouse racking system and why does it matter for Singapore warehouses?
A warehouse racking system is a structural framework that maximises storage space. It uses uprights, beams, and wire decking. In Singapore, limited space and high costs make racking essential. It helps use space efficiently, postponing expansion and cutting costs.
What are the core components of a racking system?
Core parts are uprights, load beams, and wire decking. They combine to form a structured rack system. They establish bays and aisles for safe, efficient storage.
How do racking systems improve warehouse inventory management?
Racking improves inventory by assigning fixed locations. This leads to better accuracy and reduced stock loss. They further speed fulfilment and enable live tracking.
What rack types are commonly used and when should each be chosen?
Common options include selective and drive-in/drive-thru. Use selective for access; use drive-in for dense bulk. Selection hinges on SKU profile and MHE.
How do I match rack type to inventory?
Match by size, weight, and velocity. Use selective racking for high-turnover items. For bulk storage, consider drive-in or pushback systems. Ensure compatibility with trucks and aisle widths.
What do different rack types typically cost per pallet?
Pricing depends on design and complexity. Selective pallet racks cost between $75 and $300 per position. Drive-in: around $200–$500. AS/RS pricing varies with throughput and integration.
What planning steps are required before installing racking?
Start by assessing inventory and facility limits. Consider SKU velocity and required aisle widths. Work with engineers/vendors to ensure compliance and correct install.
How do I determine load and shelf capacity?
Load capacities depend on shelf material and dimensions. Use manufacturer load tables for calculations. Post limits clearly and verify slab capacity for heavy loads.
What belongs in a procurement/installation checklist?
Confirm type, dimensions, and capacities. Include required accessories and compliance documentation. Follow install steps and schedule inspections.
How should racking be organised, labelled and integrated with technology?
Implement a standardised numbering/location scheme. Use durable labels and link to WMS for real-time updates. This supports accurate slotting and automation.
Which picking strategies pair best with racking solutions?
Pair zone picking with selective racking for speed. FIFO stock fits pallet-flow. Automated systems benefit high-throughput SKUs. Design paths to minimise travel.
How should I balance density and selectivity?
Balance is driven by velocity and access requirements. Use selective for fast movers and dense options for bulk. Put fast movers in selective; slow in dense lanes.
What safety and maintenance practices are essential for racking systems?
Post load limits and use safety accessories. Do regular inspections and timely repairs. Keep aisles and egress clear. Record inspections and fixes for compliance/insurance.
What regulatory and compliance issues should Singapore warehouses consider?
Comply with local workplace safety standards and building codes. Engage engineers and registered vendors. Follow recognised rack safety best practices and keep records for regulatory review.
How does racking support control and rotation?
Fixed racking locations improve accuracy. Enforce rotation with FIFO lanes or rules. Organised zones and clear labels help manage expiry.
What KPIs should I monitor after implementing racking systems?
Track pick rate, putaway time, and utilisation. Track inventory and picking accuracy. Use metrics to rebalance locations and gauge ROI.
When should I consider automating with AS/RS or robotics?
Consider automation when throughput, labour, or space pressures are high. AS/RS and shuttle systems offer high density and speed. Evaluate lifecycle cost and integration needs before committing.
What are the training best practices for racking?
Train on load limits, pallet placement, and reporting damage. Run post-install training plus refreshers. Promote a culture where impacts are reported promptly.
What records and documents should be kept?
Keep as-builts, load calcs, and manufacturer tables. Keep inspection logs, maintenance records, compliance certificates, and training records. These documents support audits, insurance claims, and lifecycle planning.